… Dairy-Free, Soy-Free, and Egg-Free too!

Mastering homemade pie crust can seem daunting, but it can become simple if you keep in mind a couple simple tips. I’ve been making homemade pie crust for years. I learned these tips from my mother-in-law, who was a very good cook. Put these tips to practice every time you make a pie crust, especially if you’re creating a gluten-free, dairy-free pie crust, and you’ll have delicious, flaky, beautiful, and workable dough every time. Forget these and … well, you may have to start over:D
Tip #1: ALWAYS use FROZEN non-dairy margarine!
Tip #2: Make sure your water is ICE COLD!
I find these two tips make the difference in how my crust turns out. You want to work quickly and carefully so not to overwork the dough and cause it to become tough or dried out. Have your work surface ready with a piece of wax paper (large enough to roll dough into circle to fit pie plate) and dusted with flour, your rolling pin also dusted with flour, and a pie plate (glass, metal, or ceramic) ready so you can easily move from one step to the next.
Bake time: 12-15 minutes
Oven temp: 425ºF
Makes one 9-inch crust.
Ingredients:
1 1/2 cups (180g) all-purpose, gluten-free flour, FROZEN, plus a little extra for dusting the work surface and sprinkling into dough if necessary- I use Bette’s Gourmet Four Flour Blend1
8 Tablespoons (1/2 cup or 1 stick) non-dairy margarine – I use Earth Balance Natural Buttery Spread2
1/8 teaspoon kosher salt
3 Tablespoons + 2 teaspoons water, ICE COLD
Directions:
If you will be baking the crust unfilled, preheat oven to 425ºF. Prep your work surface and cooking tools.
In a food processor, add flour, margarine, and salt. Pulse in very short bursts 5-6 times until margarine is in pea-size pieces. Drizzle water over flour mixture. Pulse again in short bursts just until dough begins to come together. Remove dough and form dough into a ball on well floured wax paper.
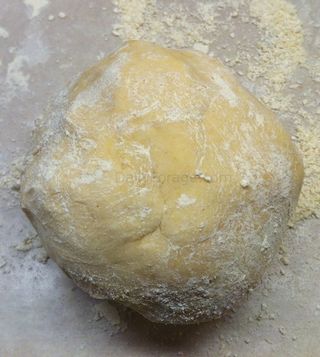
With floured rolling pin, sprinkle a dusting of flour over dough and roll out from center to edges very gently, turning the wax paper 90 degrees with each roll. This will keep the dough even and easily form a circle. Be careful not to push harder when rolling to the edges, as this will make them thinner than the center. Roll into a circle just large enough to fit pit plate. Dough should be about 1/16” inch thick.
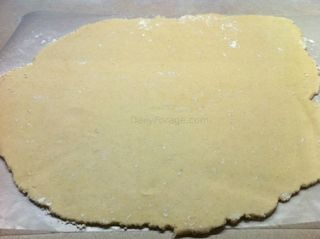
Using wax paper for support, roll dough onto rolling pin.
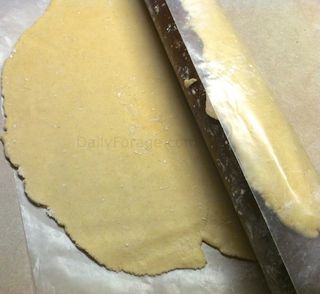
Gently by quickly remove wax paper and roll dough over pie plate.
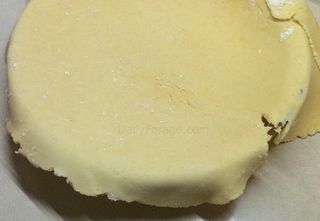
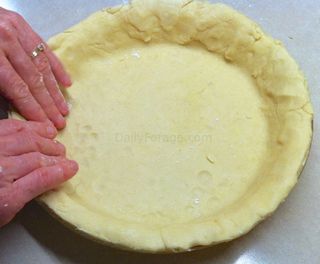
Gently press dough into pie plate to fit, adjusting along edges as you go. Don’t worry about tears or excess dough.
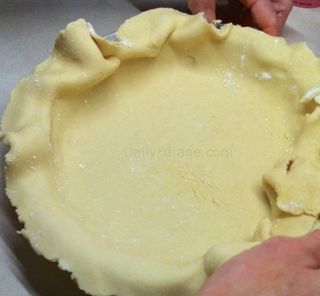
Flip excess dough under edges of dough in plate so no dough hangs over edge. Press until even and smooth, with all cracks patched by adding extra dough where needed and gently pressing to adhere to crust.
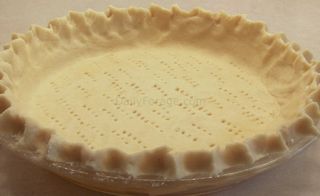
With lightly floured fingers, press dough between fingertips to make a pointed, pretty edge.
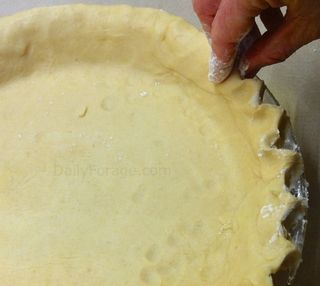
If the pie filling you’ll be using will be baked, fill the pie now and bake according to recipe; OR you can wrap the crust (still in plate) in plastic and freeze until ready to use.
If your pie filling will not be baked, then prick the bottom of crust with a fork to create air holes. This will keep the dough from bubbling up and baking unevenly.
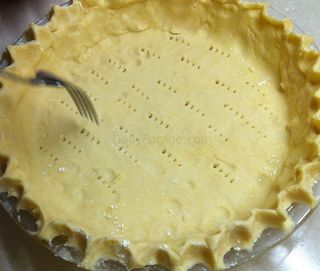
Bake crust for 12-15 minutes at 425ºF, or until fully cooked. Allow to cool completely on cooling rack before filling with pie filling.
If you want to use any leftover dough for cutout shapes to embellish your pie, dip your cutter in the flour and cut out shapes quickly. Use a well-floured spatula to transfer cutouts to baking sheet, removing excess dough around shapes.
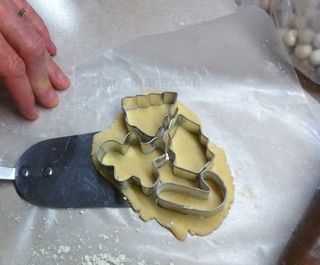
Practice makes pie crust perfect, and the sins of an ugly crust bring beauty, love, and that oh-so-appreciated personal touch to any homemade pie. Enjoy!
If you have questions on making a homemade pie crust, please be sure to ask in the comments section below. I’d love to help you create some homemade love of your own.
Safe food is a journey … Thrive!™



I love the idea of working with frozen margarine and cold, cold water. I will give that a try next time!
Yes, Peggy, this seems to make a HUGE difference for me. Let me know how it turns out for you!
Wow! I have tried many GF crust recipes. Some taste good, but look awful. Some taste AND look awful. Some are just a better alternative to nothing. THIS ONE IS FABULOUS! I honestly thought I would never be able to make a beautiful crust again….THANKS!,
Thank you so much, Jacqueline, for your very nice comments! I truly appreciate you taking the time to share your success with me. It makes me SO happy to be able to bring back something that has been missing for you. 😀
I didn’t have such a great result with my attempt. I did it the old fashion way with a dough cutter instead of the blender, but when rolling out it just wouldnt stay together, so I ended up just pushing it into the pie pan. I also think I should have tried a different GF flour b/c it tasted horrible, like bland beans (I used Bobs, which is predominantly beans i think). Does the crust you make have a buttery flavor like traditional crusts? Maybe I’ll try it again another day, thanks for the recipe
Hi Jessica, I’m sorry to hear that your pie crust didn’t turn out. I hope you’ll try it again. I don’t use other flours (at least not very often) than Authentic Foods Bette’s Gourmet Four Flour Blend, so I suspect that is part of the problem. My crust always comes out tender and flaky, IF i always remember to use VERY COLD ingredients. And I’ll be honest, Bette’s flour doesn’t taste good when it is in a “raw” recipe, but once it is baked the flavors and results are wonderful. If you still have problems with the dough being crumbly and not holding together, try pressing it into a dough ball and wrapping it in plastic wrap, then refrigerate for about an hour. Sometimes dough (especially gluten-free) just needs to sit and let the flour absorb the moisture and do it’s magic for a bit. If you’re still having trouble, feel free to leave me another comment, or send me an email, and I’ll be happy to troubleshoot further. That’s what I’m here for … to make your gluten-free journey easier. 🙂
thanks so much for the ideas! I forgot to give a follow up comment to me “negative nancy” one you replied to. After baking the crust turned out great! It was flaky and didn’t have that bad taste it did when in the raw form. I am just starting to do gluten free baking from scratch so I think I just have to re-learn what I knew from making crust with my mom and her crisco and white flour 😉
Hi Jessica, I’m so glad to hear that the baked crust was good. You’re absolutely correct when you say you have to give up expecting it to be just like making crust (or almost anything gluten-free) in the gluten-filled days of cooking. We get to have delicious food, just with a tweak here and there in the process. It’s the opportunity to do more discovering, right? Thanks for the great follow-up!